Installing Oracle RAC 11GR2

This guide will explain you how to install and configure an Oracle RAC, which can be a nightmare to install. This post will be followed by several others explaining how to debug your RAC setup, how to monitor and administer your setup etc.
The OS/DB versions I'm using are,
Oracle 11gR2 - Grid Infrastructure/ DB software
Oracle Linux 5.8
The setup will have two nodes and NFS files will be mounted on one of these nodes.
Understanding RAC and SCAN
Oracle RAC is a set of clustered databases which are build upon the shared cache architecture which allows it to be high available and high scalable.From 11g Oracle has introduced a new concept called SCAN (Single Client Access Name), this allows the the clients to access the clustered database with the single access name, the client doesn't need to know what the DB nodes that exists in the cluster. The DB can be accessed via the SCAN and failover and load-balancing will be managed by the clusterware.
You can read more about Oracle RAC from here.
Prerequisites
Each node of the Cluster needs,- A Public IP
- A Private IP
- A Virtual IP
- Should have at-least two network cards. (eth1 & eth0)
Here is a detail description of all the prerequisites that are needed.

First Install the operating system, a detailed guide on this can be found here.
First update the yum repository,
Then install Oracle Validated, this will automatically resolve dependencies (Hopefully :))
After the installation its better to update all the packages,
Now set the password for the "oracle" user.
Fisrt stop the NTPD service if its running
Create a file called "/home/oracle/grid_env" with the following contents.
Node Information
RAC1.- hostname: rac1.localdomain
- IP Address eth0: 192.168.18.104 (public address)
- IP Address eth1: 192.168.19.105 (private address)
- VIP : 192.168.18.116
- hostname: rac2.localdomain
- IP Address eth0: 192.168.18.106 (public address)
- IP Address eth1: 192.168.19.107 (private address)
- VIP : 192.168.18.117
SCAN
192.168.18.113
192.168.18.114
192.168.18.115
The architecture would look like the following,
So lets get started :)
First Install the operating system, a detailed guide on this can be found here.
Resolving Oracle Dependencies,
Log into the System as the root user and execute following commands,
# cd /etc/yum.repos.d
# wget http://public-yum.oracle.com/public-yum-el5.repo
# yum install oracle-validated
Note : Above command will resolve all package dependencies, and will create all the users that are required and it will also change all the OS related parameters and variables.
# yum update
# passwd oracleNow unzip the grid software. You can do it with the following command,
# unzip linux.x64_11gR2_grid.zip
Now go into the unzipped folder, in my case “cd /home/software/grid” and execute the following command.
# rpm -Uvh cvuqdisk*
Now add the Node IP details to the /etc/hosts file, change the content of the following as you wish but make sure everything is changed when referring further into this post.
The Host File will look like this
# Do not remove the following line, or various programs
# that require network functionality will fail.
127.0.0.1 localhost.localdomain localhost
::1 localhost6.localdomain6 localhost6
# Public
192.168.18.104 rac1.localdomain rac1
192.168.18.106 rac2.localdomain rac2
#Private
192.168.19.105 rac1-priv.localdomain rac1-priv
192.168.19.107 rac2-priv.localdomain rac2-priv
#Virtual
192.168.18.116 rac1-vip.localdomain rac1-vip
192.168.18.117 rac2-vip.localdomain rac2-vip
#NAS - This is for the NFS mount
192.168.18.104 nas1.localdomain nas1
Note : It not necessary to include the private IPs of each node in this, and If you do not have a DNS server then you can include the SCAN IP’s also in the host file, and note that this is not acceptable in a production scenario.
Now Change the SELINUX parameter at "/etc/selinux/config" as following
SELINUX=permissive
Make sure that your firewalls are turned off, execute the following commands to make sure that they are turned off.
# service iptables stop# chkconfig iptables off
Now sync your time using a NTP server, you can use the Oracle time syncing service as well to sync the server times. In my case I'll be using the default ntpd service. I'll be syncing my time with local government time server (sltime.org). execute the following commands to sync the time. Make sure that you are loged in as the root user.
#service ntpd stop
then you can sync your time with a local NTP server, in my case I’m using local government NTP server,
# ntpdate sltime.org
Now alter the parameter at “/etc/sysconfig/ntpd” as following
OPTIONS="-x -u ntp:ntp -p /var/run/ntpd.pid"
Then restart NTP service
# service ntpd restart
you can use the following command to check the time
# date
Create the directories in which the Oracle software will be installed.
# mkdir -p /u01/app/11.2.0/grid# mkdir -p /u01/app/oracle/product/11.2.0/db_1# chown -R oracle:oinstall /u01# chmod -R 775 /u01/
Login as the "oracle" user and add the following lines at the end of the "/home/oracle/.bash_profile" file.
# Oracle Settings
TMP=/tmp; export TMP
TMPDIR=$TMP; export TMPDIR
ORACLE_HOSTNAME=rac1.localdomain; export ORACLE_HOSTNAME
ORACLE_UNQNAME=rac; export ORACLE_UNQNAME
ORACLE_BASE=/u01/app/oracle; export ORACLE_BASE
GRID_HOME=/u01/app/11.2.0/grid; export GRID_HOME
DB_HOME=$ORACLE_BASE/product/11.2.0/db_1; export DB_HOME
ORACLE_HOME=$DB_HOME; export ORACLE_HOME
ORACLE_SID=rac1; export ORACLE_SID
ORACLE_TERM=xterm; export ORACLE_TERM
BASE_PATH=/usr/sbin:$PATH; export BASE_PATH
PATH=$ORACLE_HOME/bin:$BASE_PATH; export PATH
LD_LIBRARY_PATH=$ORACLE_HOME/lib:/lib:/usr/lib; export LD_LIBRARY_PATH
CLASSPATH=$ORACLE_HOME/JRE:$ORACLE_HOME/jlib:$ORACLE_HOME/rdbms/jlib; export CLASSPATH
if [ $USER = "oracle" ]; then
if [ $SHELL = "/bin/ksh" ]; then
ulimit -p 16384
ulimit -n 65536
else
ulimit -u 16384 -n 65536
fi
fi
alias grid_env='. /home/oracle/grid_env'
alias db_env='. /home/oracle/db_env'
ORACLE_HOME=$GRID_HOME; export ORACLE_HOME
PATH=$ORACLE_HOME/bin:$BASE_PATH; export PATH
LD_LIBRARY_PATH=$ORACLE_HOME/lib:/lib:/usr/lib; export LD_LIBRARY_PATH
CLASSPATH=$ORACLE_HOME/JRE:$ORACLE_HOME/jlib:$ORACLE_HOME/rdbms/jlib; export CLASSPATH
Create a file called "/home/oracle/db_env" with the following contents.
ORACLE_SID=rac1; export ORACLE_SID
ORACLE_HOME=$DB_HOME; export ORACLE_HOME
PATH=$ORACLE_HOME/bin:$BASE_PATH; export PATH
LD_LIBRARY_PATH=$ORACLE_HOME/lib:/lib:/usr/lib; export LD_LIBRARY_PATH
CLASSPATH=$ORACLE_HOME/JRE:$ORACLE_HOME/jlib:$ORACLE_HOME/rdbms/jlib; export CLASSPATH
Note : make sure that you make the changes accordingly on both servers, ORACLE_SID and HOSTNAME has to changed accordingly on each node.
Now its better to do a system restart.
Create Shared Disks
First we need to set up some NFS shares. In this case we will do this on the rac1 node, but you can do the on a NAS or a third server if you have one available.
On the rac1 node create the following directories.
Make Sure you run the following command to check all the prerequisites are been met,you can execute the following by going to the extracted grid infrastructure directory.
# mkdir /shared_config# mkdir /shared_grid# mkdir /shared_home# mkdir /shared_data
Add the following lines to the "/etc/exports" file.
/shared_config *(rw,sync,no_wdelay,insecure_locks,no_root_squash)
/shared_grid *(rw,sync,no_wdelay,insecure_locks,no_root_squash)
/shared_home *(rw,sync,no_wdelay,insecure_locks,no_root_squash)
/shared_data *(rw,sync,no_wdelay,insecure_locks,no_root_squash)
Run the following command to export the NFS shares.
# chkconfig nfs on# service nfs restart
On both RAC1 and RAC2 create the directories in which the Oracle software will be installed.
# mkdir -p /u01/app/11.2.0/grid# mkdir -p /u01/app/oracle/product/11.2.0/db_1# mkdir -p /u01/oradata# mkdir -p /u01/shared_config# chown -R oracle:oinstall /u01/app /u01/app/oracle /u01/oradata /u01/shared_config# chmod -R 775 /u01/app /u01/app/oracle /u01/oradata /u01/shared_config
Add the following lines to the "/etc/fstab" file, this will mount the disks on boot.
nas1:/shared_config /u01/shared_config nfs rw,bg,hard,nointr,tcp,vers=3,timeo=600,rsize=32768,wsize=32768,actimeo=0 0 0
nas1:/shared_grid /u01/app/11.2.0/grid nfs rw,bg,hard,nointr,tcp,vers=3,timeo=600,rsize=32768,wsize=32768,actimeo=0 0 0
nas1:/shared_home /u01/app/oracle/product/11.2.0/db_1 nfs rw,bg,hard,nointr,tcp,vers=3,timeo=600,rsize=32768,wsize=32768,actimeo=0 0 0
nas1:/shared_data /u01/oradata nfs rw,bg,hard,nointr,tcp,vers=3,timeo=600,rsize=32768,wsize=32768,actimeo=0 0 0
Mount the NFS shares on both servers.
# mount /u01/shared_config# mount /u01/app/11.2.0/grid# mount /u01/app/oracle/product/11.2.0/db_1# mount /u01/oradata
or you can issue the following command
# mount -a
Make sure the permissions on the shared directories are correct.
# chown -R oracle:oinstall /u01/shared_config# chown -R oracle:oinstall /u01/app/11.2.0/grid# chown -R oracle:oinstall /u01/app/oracle/product/11.2.0/db_1 # chown -R oracle:oinstall /u01/oradata
Make Sure you run the following command to check all the prerequisites are been met,you can execute the following by going to the extracted grid infrastructure directory.
# ./runcluvfy.sh stage -pre crsinst -n rac1,rac2 -verbose
Note : Make sure You have resolved all the dependencies and other issues that are indicated after running the above command.
Now Lets Install the GRID Infrastructure.
Go to the extracted Grid Infrastructure directory and run the following command,
# ./runInstaller
Select Install and Configure grid infrastructure.


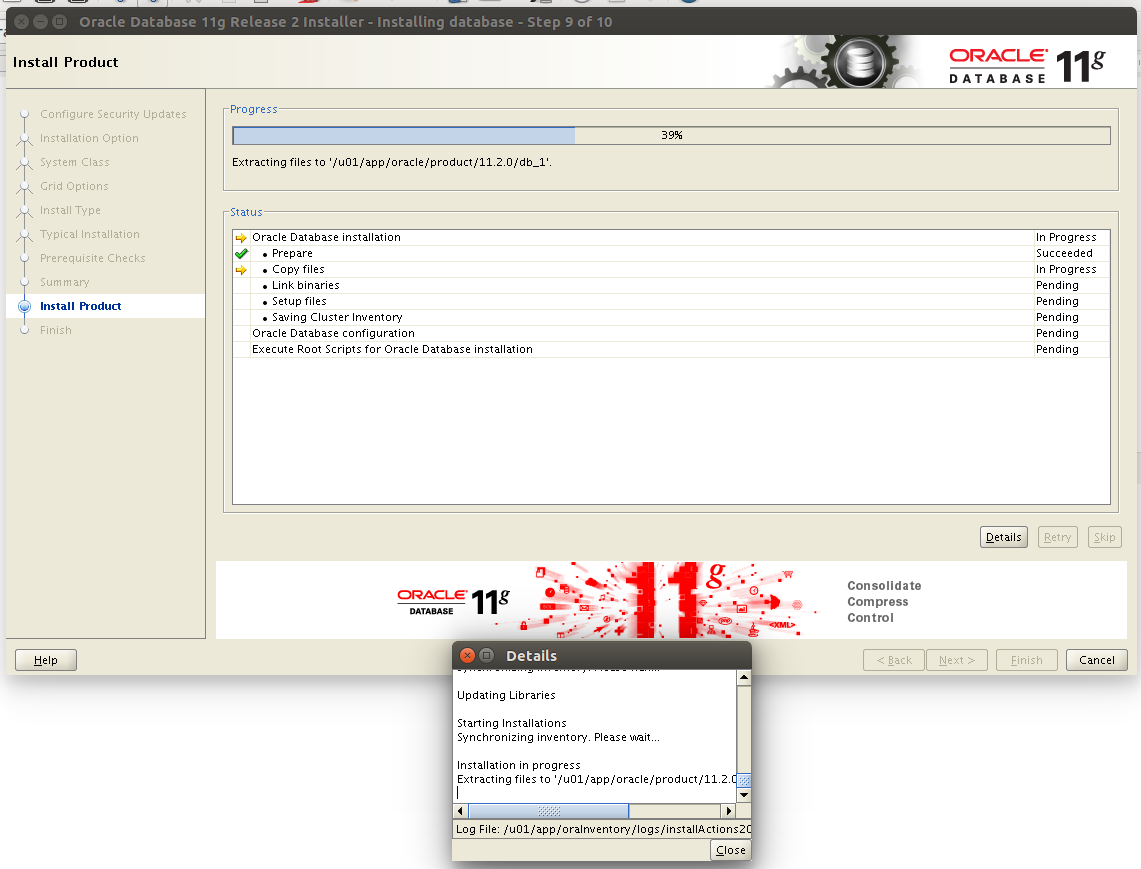
Note Sometimes the setup may look like it is stuck, like following but wait for the setup to continue.

Now execute the Scripts prompted in the , First run the scripts in the first node and then you can execute the scripts in the other nodes. Make sure you run the scripts as the root user.

The script will look like following.

Complete the setup by clicking on Close.

Now lets install the DB instances. Extract your DB setup, this will have two parts normally. Go to the extracted directory and run


Note : give the Global database name as "rac" not "rac.localdomain".
other options as the following,


You can change the default passwords if you wish.


Select Advance Options and continue.
Add the respective scan name, and deselect the GNS option.
Add the relevant node information
After adding the Node information Setup the password-less SSH connectivity between each node.
Now select the relevant network interfaces.
Here select the Shared File System option.
Now select the external redundancy option for the OCR file location and add the path as following,
Similarly add the Voting Disk configs as following
Select as following and press click next.
Select dba as the user group and continue.
Ignore the following warning and continue.
Enter "/u01/app/oracle" as the Oracle Base and "/u01/app/11.2.0/grid" as the software location, and continue.
Keep the default Inventory location.
If everything is OK the prerequisites are met, the setup will automatically move to the setup summary page. If you are fine with the configurations continue to the installation.
Note Sometimes the setup may look like it is stuck, like following but wait for the setup to continue.
Now execute the Scripts prompted in the , First run the scripts in the first node and then you can execute the scripts in the other nodes. Make sure you run the scripts as the root user.
The script will look like following.
Complete the setup by clicking on Close.
Installing the DB
Now lets install the DB instances. Extract your DB setup, this will have two parts normally. Go to the extracted directory and run
#./runInstallerContinue the setup process as following.
Note : give the Global database name as "rac" not "rac.localdomain".
other options as the following,
You can change the default passwords if you wish.
Now the set up is completed and you can check the functionality of the rac by the following commands.
To check whether RAC is working properly.
To check the RAc Apps
# /u01/app/11.2.0/grid/bin/srvctl status nodeapps
To check the CRS
# /u01/app/11.2.0/grid/bin/crsctl check crs
To check the status of listeners.
# /u01/app/11.2.0/grid/bin/srvctl status listener
# /u01/app/11.2.0/grid/bin/srvctl config listener
To verify OCR intergrity
#/u01/app/11.2.0/grid/bin/cluvfy comp ocr -n all -verbose
To chec the status of CRS
#/u01/app/11.2.0/grid/bin/crs_stat -t -v
Note : The gns service ad asm will be offline since we are not using them.
The RAC setup is now completed you can Refer to the RAC administratin and debug guide if you have any issues.
Thanks For reading, and any query is welcome.


0 comments:
Post a Comment